Lethabo Moroka
1 year, 7 months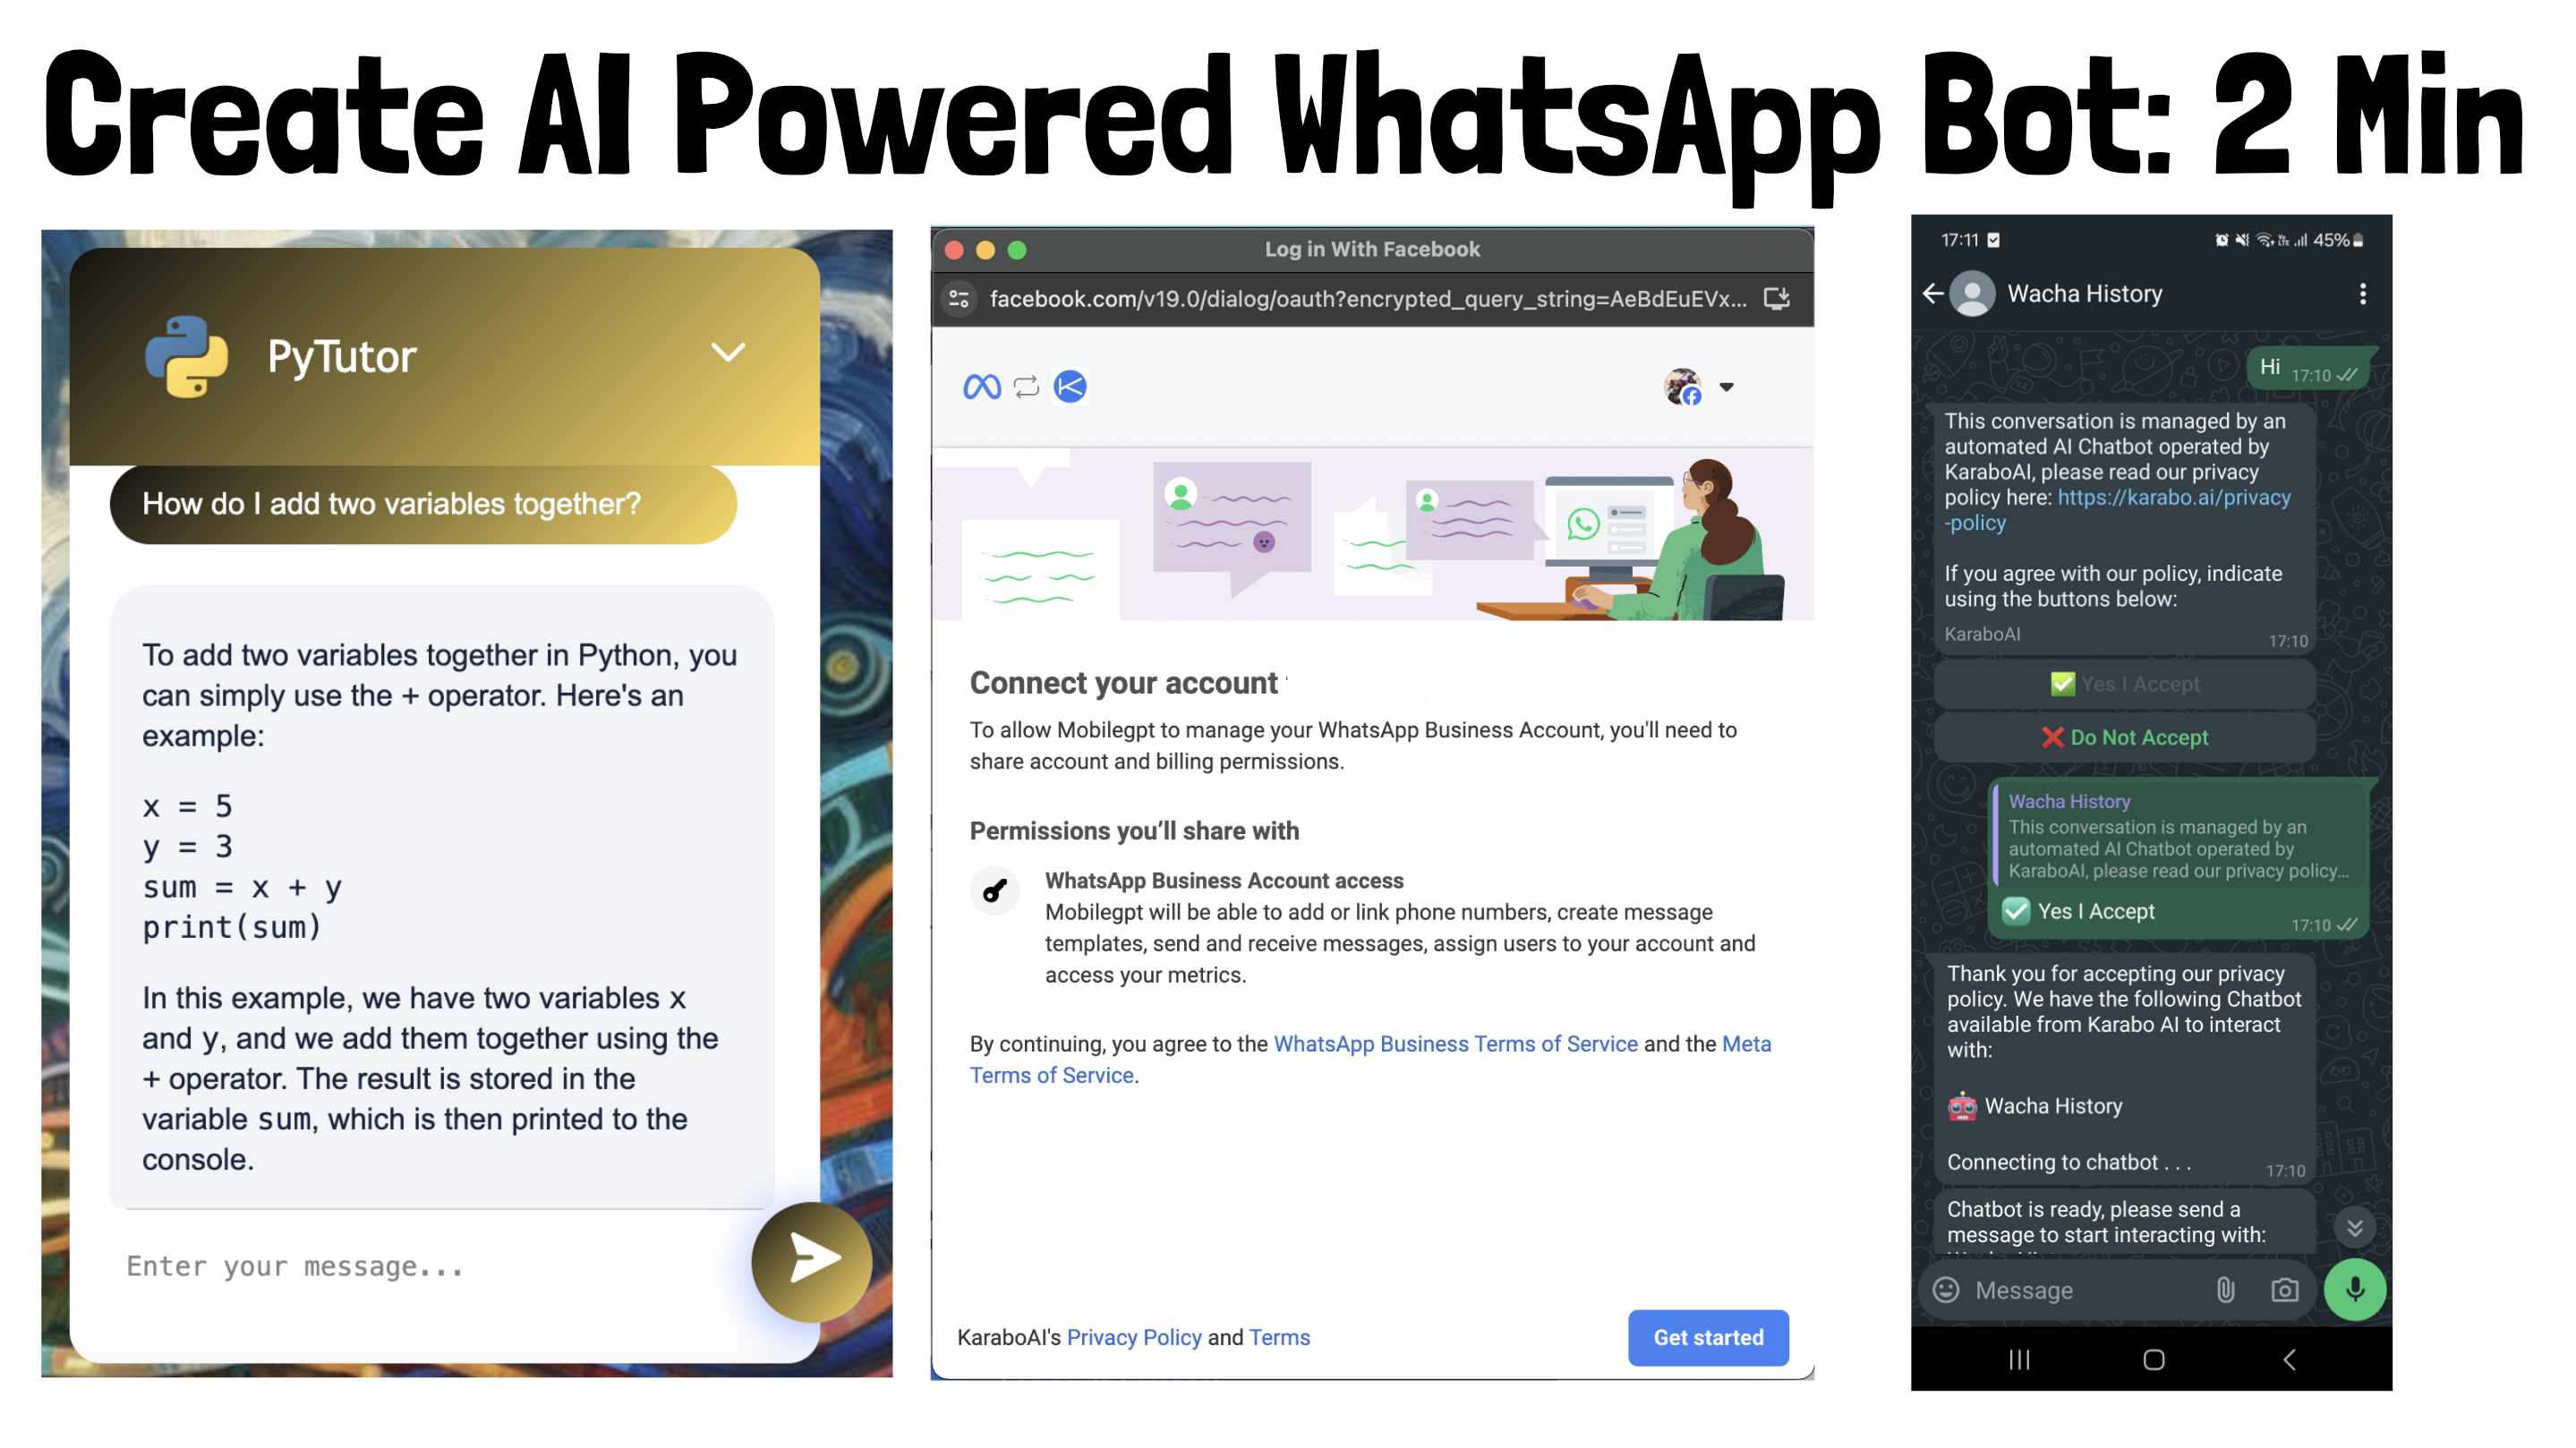
How to Create Custom WhatsApp Chatbot
In this guide I will share how to create a custom WhatsApp chatbot. The WhatsApp API (Application Programming Interface) makes it possible for developers to connect directly with WhatsApp Business for the purposes of creating and managing chat conversations. This is the same API that is used by Karabo to bring you AI chatbots that can be deployed on WhatsApp. Before we get started, you will need the following:
Pre-Requisites - What you need before you can start
- You will need an active Facebook (Meta) Account that was not created recently.
- A KaraboAI account and at least one chatbot. Follow this guide to create your first AI Chatbot. When designing an AI chatbot, clear instructions and prompting can make all the different, make sure you incorporate the tools discussed here - how to write AI chatbot instructions.
- A new phone number which is not currently connected to any WhatsApp or Business WhatsApp. This must be a brand new number to avoid problems.
That is it, all you need, let us get started.
Step 1: Navigate to WhatsApp Set Up Page
From your KaraboAI dashboard, you can navigate to the WhatsApp set-up page by clicking on the WhatsApp image.
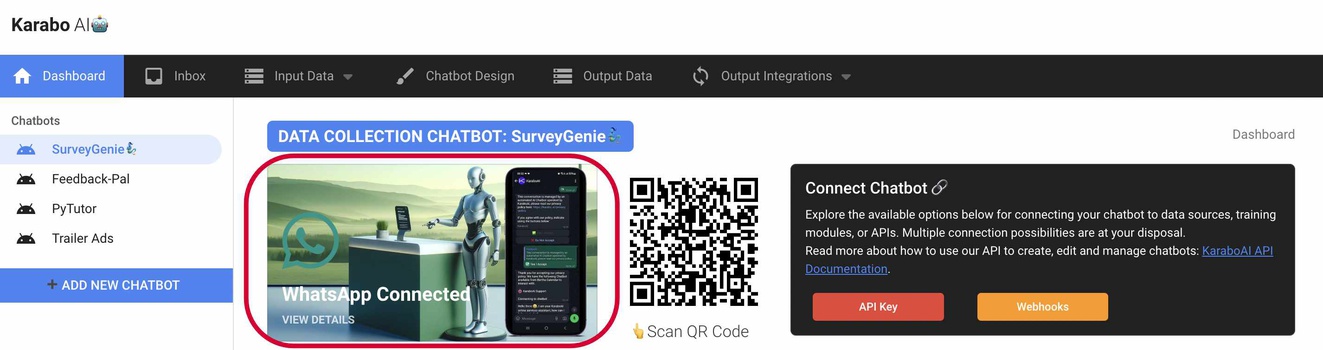
Note: You will need a paid Karabo subscription to use the WhatsApp features.
Step 2: Connect your Meta Account
Karabo is built with an easy WhatsApp integration flow, where you can connect directly with your Meta account without having to leave our platform.
These are the high level steps involved with the WhatsApp Integration
- Step 1: Grant KaraboAI Access to your WhatsApp Business Account (WABA) and obtain the WABA number
- Step 2: Provide the WABA, Phone Number you would like to activate and PIN to proceed with integration
- Step 3: Wait to receive a Verification Code on your phone via SMS and provide that code back to us
- Step 4: Select the Chatbot you would like to add to your new integration
- Step 5: Add payment method directly with WhatsApp/Meta
Step 2.1 Click on the Login with Facebook Button

Before you click this, look at the screenshot to the right. You will need to take note of the WABA - this is the WhatsApp Business Account Number. You will need it in the next step. Write is down and double check that it is correct.
Step 2.2 Follow Integration Steps
The rest is straight-forward. Just follow these integrations steps:
First select or create a new business profile, then select or create a new WABA.
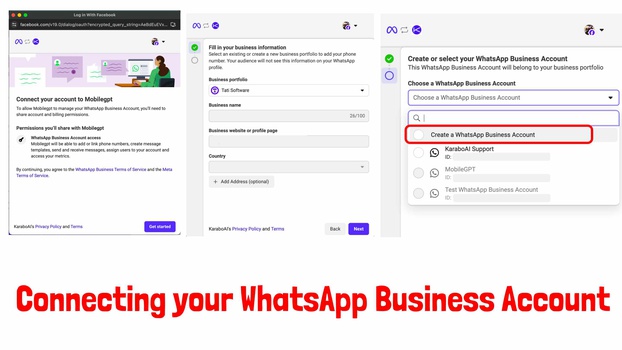
Note, if you create a new WABA (WhatsApp Business Account) - you will not see the number on the list. You will need to go through the steps again just to see the (WABA) number you need for the next step.
Step 2.3: Complete the rest of the set-up steps

Enter your WhatsApp Business Name and complete the rest of the steps, you have the option to enter payment method now so that you have unlimited WhatsApp conversations - otherwise your conversations will be limited.
Read more about WhatsApp Business API pricing here.
At this stage, you might need to go through the steps again, just to see the WABA number.
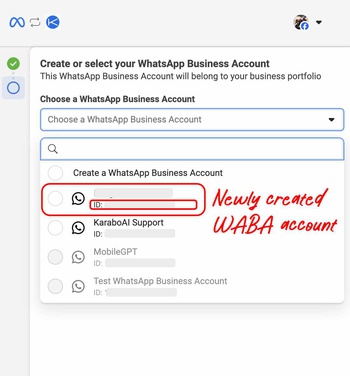
When you go through the steps again, you will see the new account and the WABA number — the number after the ID: xxxxxxxxx. Write this number down carefully.
No need to actually complete the steps again, you have already granted access, this repeat was just for you to see the WABA number and write it down.
Step 3: Register your WhatsApp Number and Account
The next step is to register the account and bond it to a phone number.
Scroll down to the bottom of the page until you see this:
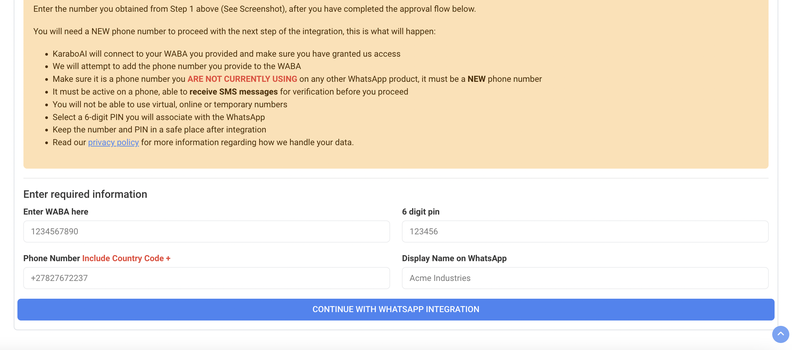
This is where you can register a phone number and bond it to your WABA - WhatsApp Business Account.
You will need the following:
- The WABA you obtained from the steps above
- A phone number you have not used before on WhatsApp or Business WhatsApp
- A random 6 digit pin to lock your account - do not loose this pin
- The display name you would like to use on WhatsApp (Probably your business name)
Enter this on the form and click the button to continue. Make sure you have your phone with you. You will receive a verification code on the number that you have entered. This verification code is required in the next step.
If you do not receive a verification code, try a different new number. It might be that you number is already registered on WhatsApp.
This is an example of what you should enter here:

If all goes well you will get a code sent to your phone:
If there is an error, you will see the error here.
If it says all went well and you dont get a code, just try it again to resent the code.
Enter the code and you are done ✅
Step 4: Add Chatbot to your number
You will be routed to this page when you are done with verification
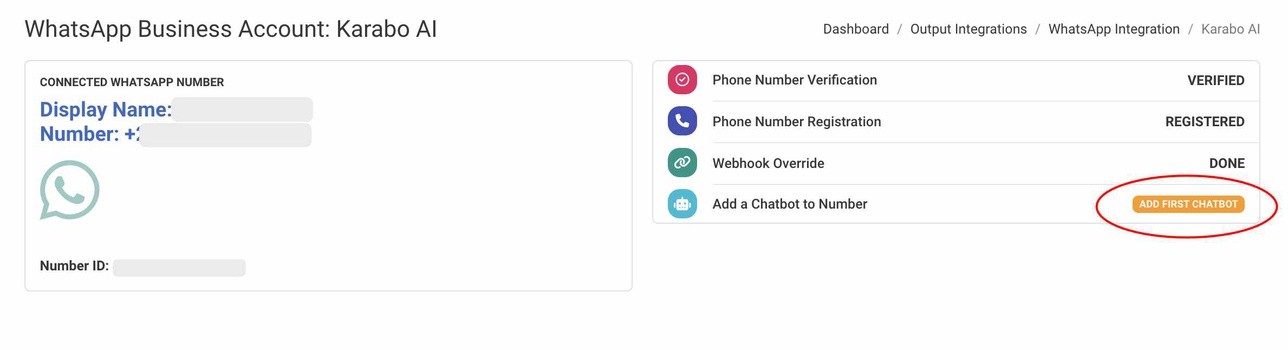
Click on the ADD FIRST CHATBOT BUTTON
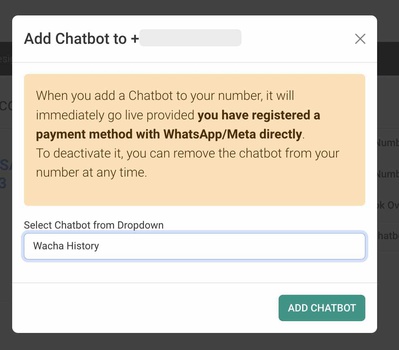
Select from the drop-down the chatbot to add and save.
You can come here, remove a chatbot or add multiple chatbots to the same number.
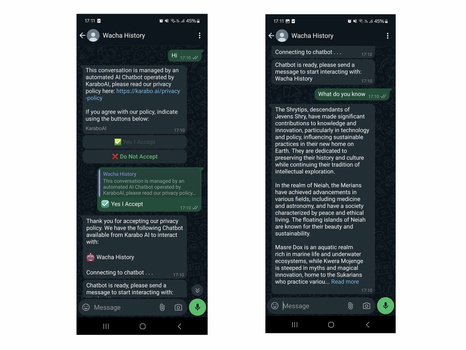
Step 6 - Message your Chatbot