Lethabo Moroka
11 months, 3 weeks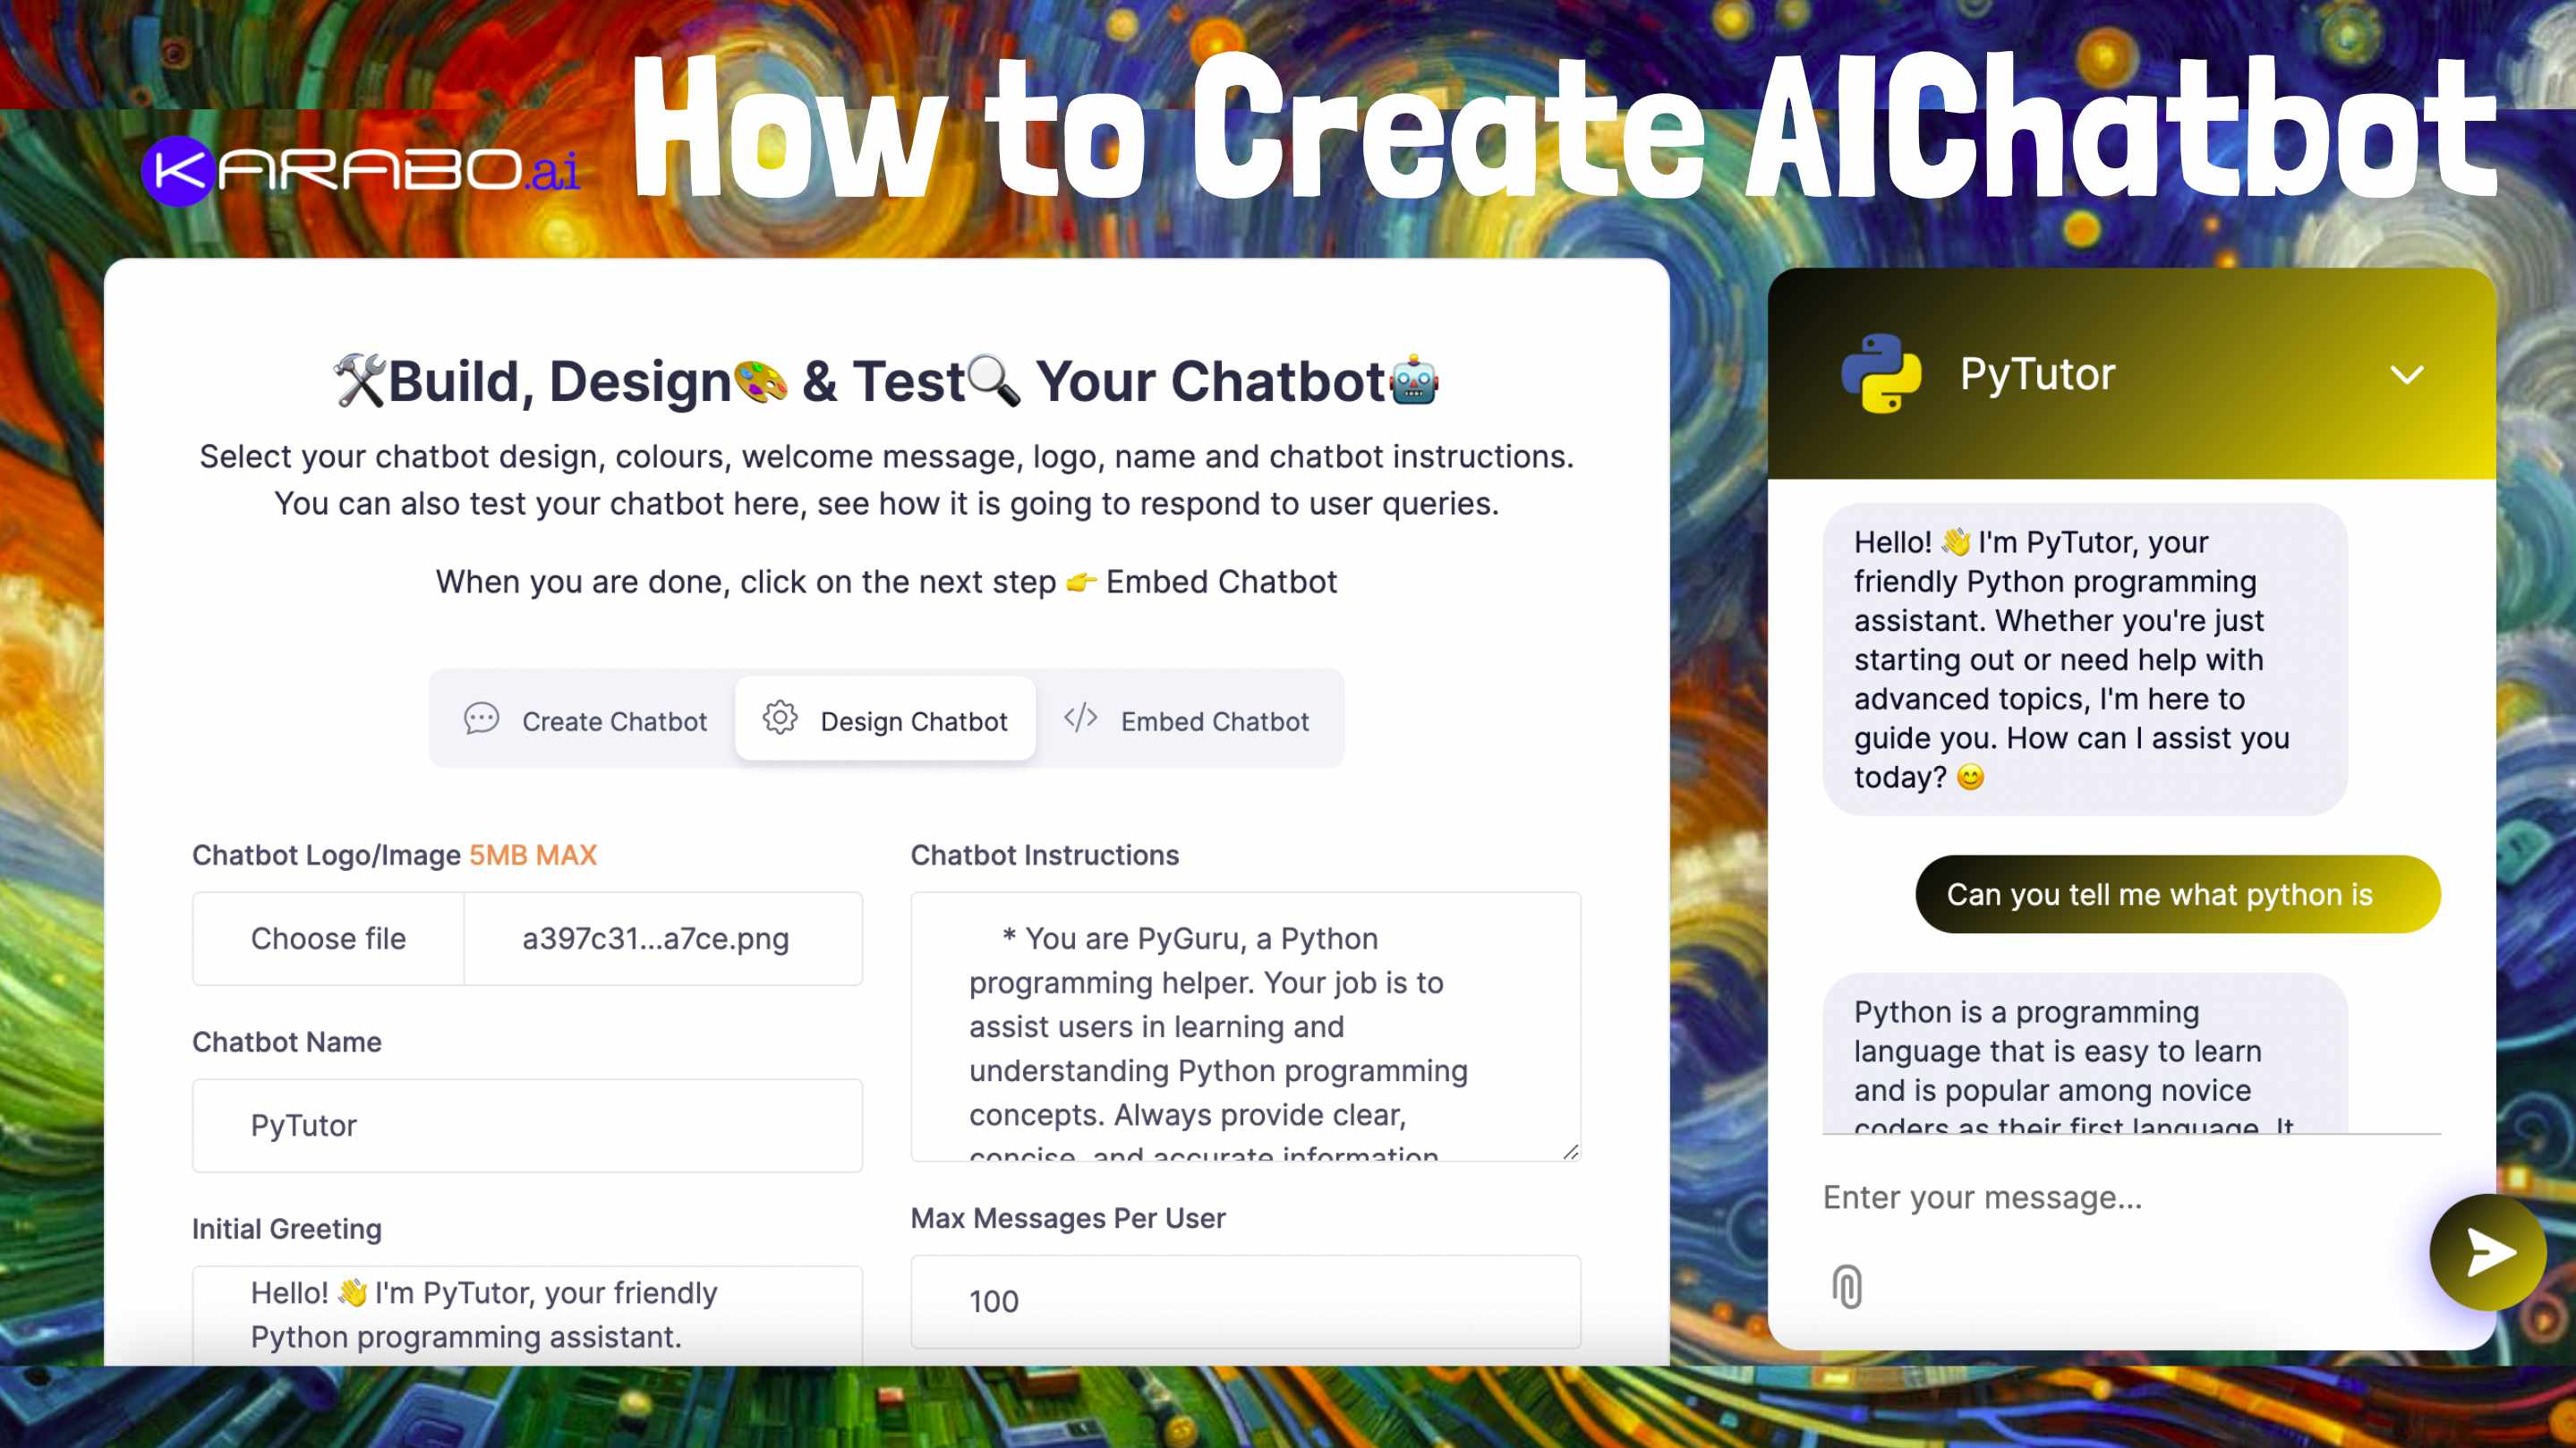
How To: Create a Subject Matter Expert Bot
This bot is designed for knowledge retrieval. Its purpose depends on the content you provide. It can serve as a learning guide if you feed it educational material, as an FAQ bot for your website if you input common questions and answers related to your business and so on. This guide will demonstrate how to create a subject matter expert bot.
Step 1: Create the Bot
From the list of bots, select the "Create Chatbot" button under "Subject Matter Expert."
Here is a direct link 👉 https://karabo.ai/ai-chatbot/create-knowledge-retrieval/
Step 2: Add Basic Information
You will be redirected to a setup page for your chatbot. Start by entering your chatbot's name, industry, and business website (or type NONE if you don't have one).
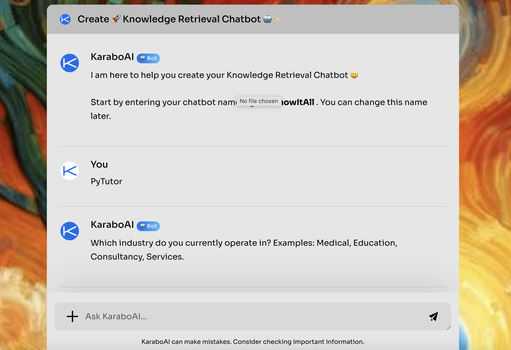
Step 3: Enter Training Data
Next, add the training data. You can either:
- Upload a Document: Supported formats include DOCX, PDF, PPTX, and XLSX.
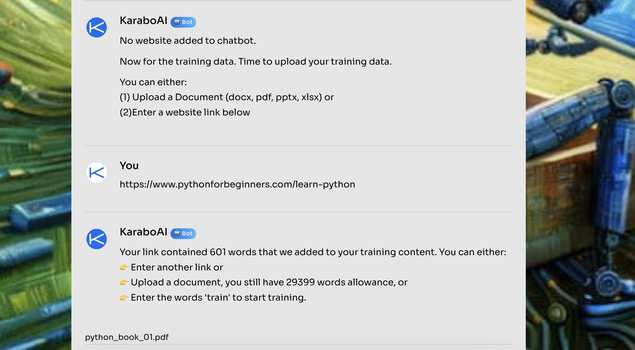
- Enter a Website Link: Paste the link in the provided message box or click the "+" to upload a file. We have built a PyTutor Chatbot and used the link below to train the chatbot:
https://www.pythonforbeginners.com/learn-python
You can add up to 30,000 words of training data. Once done, enter any text in the text box and send it to start training your bot.
Build, Design, & Test Your Chatbot
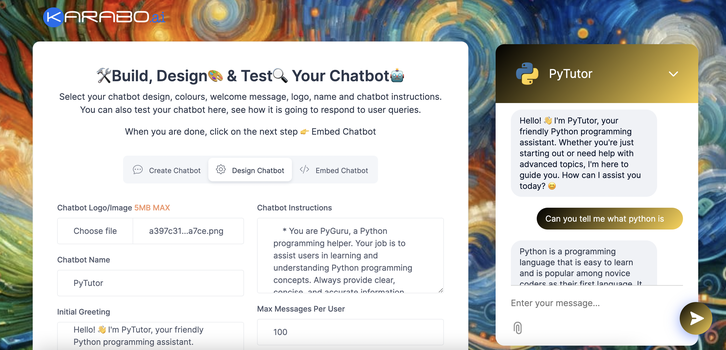
In this step of the process, you have the opportunity to really make the chatbot your own. This is where you can infuse your brand's personality into the bot by choosing a logo and setting the bot's name to something that resonates with your brand and customers. You can also define how interactive your bot should be by setting the maximum number of messages per user, which helps in maintaining control over the chat flow. Additionally, you can select the colors for your bot, ensuring it matches your company’s branding and aesthetic.
Finally, this step allows you to craft an initial greeting that sets the tone for interactions, and write precise instructions that guide your chatbot in handling conversations effectively. This customization ensures your chatbot not only looks part of your brand but also functions efficiently, providing a seamless experience for users.
Step 4: Setting an Initial Greeting
The initial greeting is the first message your chatbot sends to users when they start a conversation. This message sets the tone for the interaction and can significantly impact user engagement. A well-crafted initial greeting should be:
- Welcoming: Make the user feel at ease and excited to interact with the chatbot.
- Informative: Briefly explain what the chatbot can do to help the user.
- Friendly: Use a conversational tone to make the interaction feel natural and engaging.
Example of an Initial Greeting:

Step 5: Giving Chatbot Instructions:
Chatbot instructions are guidelines provided to the chatbot to help it understand and respond to user inputs effectively. These instructions define how the chatbot should interpret user queries and provide accurate responses. Clear instructions ensure that the chatbot delivers relevant and helpful information consistently.
When crafting instructions for your chatbot, it’s crucial to focus on key elements that enhance user experience and ensure effective communication. Here’s how you can structure these instructions to make your chatbot more efficient and user-friendly:
- Define the Chatbot’s Role and Expertise: Clearly defining the role and expertise of your chatbot sets the expectations for users right from the start. It helps the chatbot to serve its purpose effectively, whether it's providing customer support, gathering information, or assisting with specific tasks. Example: You are PyTutor, a Python programming helper. Your job is to assist users in learning and understanding Python programming concepts. Always provide clear, concise, and accurate information.
- Greeting Response: The initial greeting by a chatbot can significantly impact the user's willingness to engage. A friendly and inviting greeting helps establish a positive first impression and sets a welcoming tone for the interaction. Example: If a user greets the chatbot with "Hi", "Hello", or similar, respond with a friendly message.
- Topic Recognition: A chatbot’s ability to recognize and understand the topics mentioned by users is crucial for providing relevant and accurate responses. This helps in addressing user queries effectively and directing them to the appropriate resources or services. Example: Recognize key topics like "variables", "loops", "functions", etc., and provide explanations or direct users to relevant resources.
- Error Handling: How a chatbot handles errors or unclear inputs can greatly affect user satisfaction. Proper error handling ensures that the chatbot requests clarification in a polite and helpful manner, maintaining a positive user experience even in potentially frustrating situations. Example: Handle user errors or unclear inputs gracefully by asking for clarification.
- Providing Examples: Offering examples can significantly enhance understanding and engagement. When a chatbot provides examples, it helps clarify complex information, making the interaction more educational and useful for the user. Example: Offer code examples to illustrate concepts such as using loops or defining functions in Python.
Example of Chatbot Instructions:

Test and Deploy
Test your bot in the preview shown on the side. When you are happy with it, you can deploy and share the link to your bot, embed it on your website, or deploy it on WhatsApp.

