Lethabo Moroka
1 year, 9 months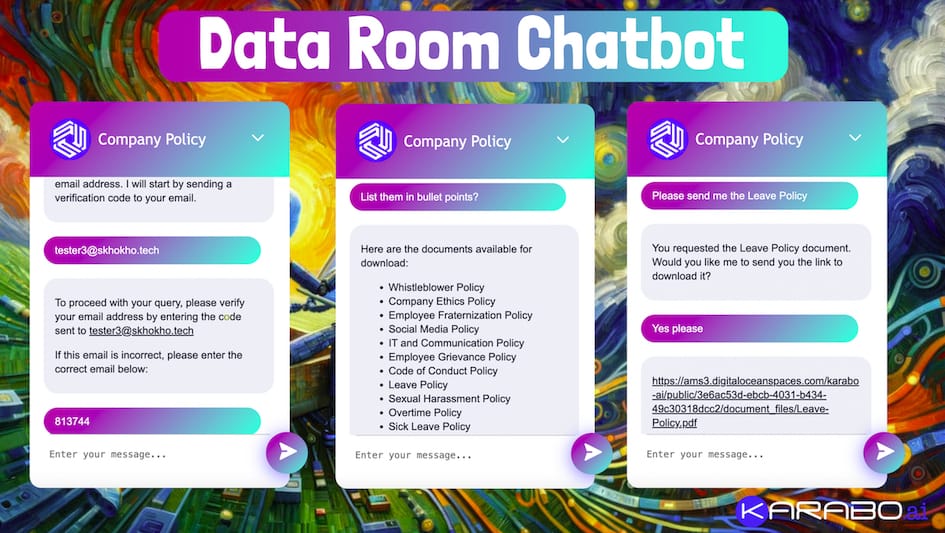
How To: Create a Data Room Chatbot
Do you often share documents via Google Drive or Dropbox, like when you need to provide investors with business documents or share company policies with employees? Typically, you'd send a link, and recipients must download and sift through documents to find relevant information. This process makes it difficult to track who has accessed the documents and can lead to data leaks.
Imagine instead, placing your documents in a secure data room and sharing a single chatbot link. This chatbot acts as a gatekeeper, allowing users to interact as they would with any other chatbot. It first verifies their email address to ensure they were invited, then answers their questions about the documents. Users can still download full documents, such as a pitch deck or a policy. Let's explore how to create a data room chatbot with KaraboAI.
Step 1: Upload Documents
The first step when creating a Data Room Chatbot is uploading documents. You have two types of documents you can upload:
- Documents used for training
- Documents people can download

These are separate because you could have content you want people to be able to query, eg. analytics and then have structured documents people can download, eg. Polished Pitchdeck.
Step 2: Add Users with Access
The data room chatbot is designed with a strong focus on privacy and security. You may not want just anyone with the link to access your sensitive documents. To address this, the chatbot employs a robust verification process.
When users attempt to access the data room, the chatbot first requests their email address. It then sends a verification code to that email address. Users must enter the correct verification code to proceed. Moreover, the system checks if the email is on the authorized access list. Only those who provide the correct code and are pre-approved will be granted access to the documents.

This multi-step verification ensures that your documents remain secure and accessible only to the intended recipients, providing you with peace of mind and greater control over your sensitive information.
So the second step is to add all the users that would be allowed to access the chatbot.
Step 3: Test the Chatbot
The next step involves testing and customizing the chatbot to align perfectly with your brand identity. Begin by selecting your preferred colors and adding your company logo to personalize the chatbot’s appearance. This ensures that the chatbot visually fits within your brand's aesthetic.
Once you've tailored the visual elements, it’s time to evaluate its performance. Engage with the chatbot by asking various questions. Observe how it responds—does it provide accurate and relevant answers? Does it behave in the manner you expect? This testing phase is crucial to fine-tuning the chatbot’s functionality, ensuring it meets your expectations and delivers a seamless user experience.

By thoroughly testing and customizing the chatbot, you ensure it not only looks the part but also effectively serves its purpose, enhancing the user experience while maintaining your brand's integrity.
Finally
Feel free to share the chatbot link with everyone on your authorized list. Even if the link gets leaked, rest assured that only those you have added can access the Data Room content. This method is both secure and user-friendly for sharing documents.
You can also embed the chatbot as a website widget on your website, company intranet, or any other online platform. This makes it easily accessible for your users right where they need it.
Additionally, you have the option to deploy your chatbot on WhatsApp. Users can access it there and receive the same responses they would get through other channels. This versatility ensures that your chatbot can meet users wherever they are.
All interactions and activities are tracked and recorded in your dashboard. You can see who accessed the bot, when they accessed it, and what documents they downloaded. This comprehensive tracking helps you maintain control and oversight over your document sharing.

Moreover, you can expand your Data Room anytime by adding new documents. From the documents section, you can easily upload new downloadable files or training content, ensuring your Data Room is always up-to-date and relevant.