Lethabo Moroka
1 year, 8 months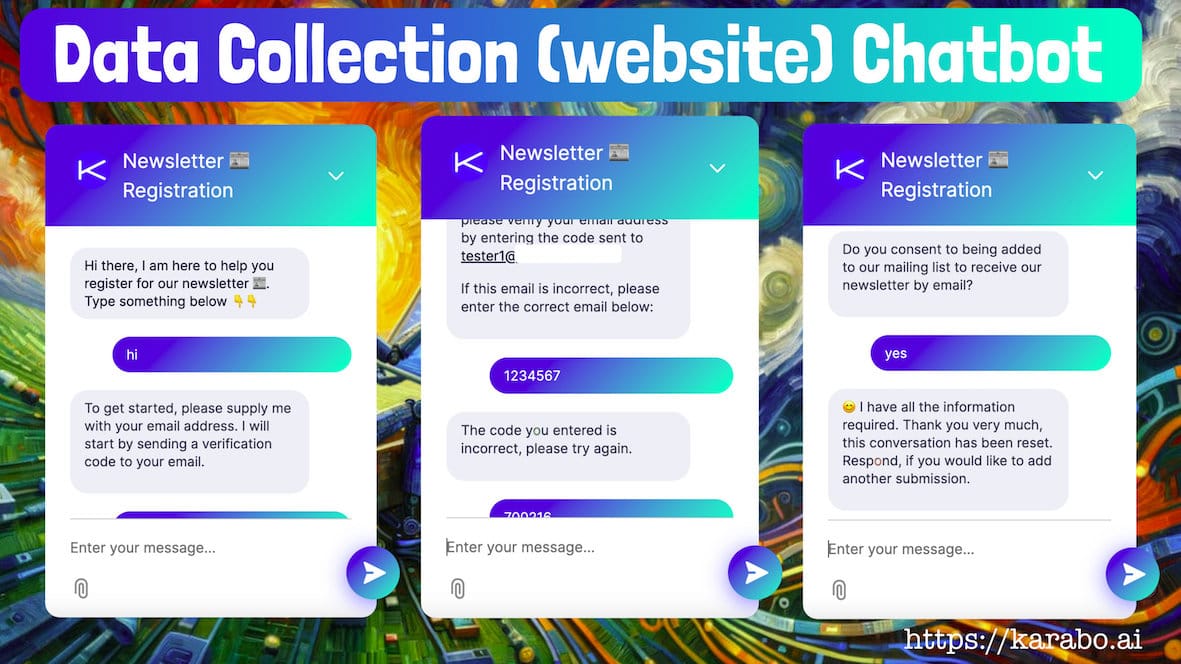
How To: Create a Data Collection Chatbot
A data collection chatbot is a specialized type of chatbot designed to gather information from users through conversational interfaces. Unlike traditional forms, these chatbots engage users in dialogue, asking questions to collect the required data in a more interactive and user-friendly manner.
The information gathered can range from simple contact details to more complex feedback or survey responses. Data collected by these chatbots is typically stored in a backend system, making it accessible for further analysis or integration with other business systems. This technology allows businesses to automate data collection processes, enhance user engagement, and streamline the handling of large volumes of inquiries or information requests efficiently.
Creating a data collection chatbot on KaraboAI is a straightforward process that allows you to gather information just like you would with a standard form, but in a more interactive and engaging way. Here’s a simple guide to help you set up your chatbot, designed to collect data efficiently without needing any coding skills.
Step 1: Add Data Points
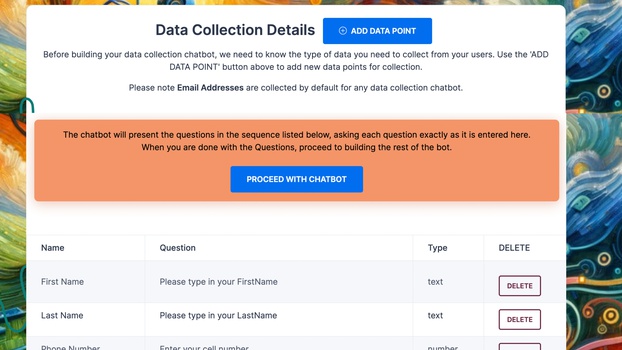
Before you start designing your chatbot, you need to specify what information you want to collect from users. On KaraboAI, you begin this by using the 'ADD DATA POINT' feature. This function allows you to define each piece of information you intend to gather, such as the user's first name, phone number, or any other details relevant to your needs.
- Name: Assign a name to each data point (e.g., First Name, Last Name).
- Question: Decide how the chatbot should ask for each piece of information (e.g., “What is your first name?” or “Please enter your first name.”).
- Type: Choose the type of response you require for each question—this could be text-input, a number, a yes/no response, image upload, or PDF upload.
You can add as many data points as needed to cover all the information you want to collect. Each data point you add configures your chatbot to ask a specific question corresponding to the data you need to gather.
Step 2: Set Up Chatbot Basics
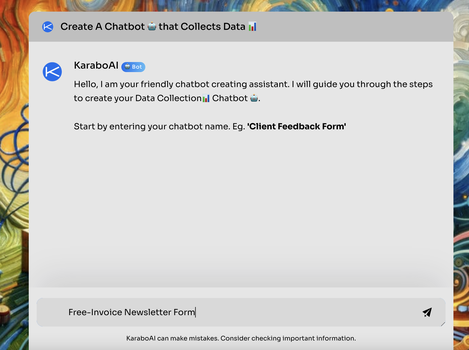
After setting up your data points, you’ll be directed to a setup page where you can name your chatbot and define its broader attributes:
- Bot Name and Industry: Name your bot and select the industry it will operate in to help tailor its interactions.
- Privacy Policy Link: Since you're collecting user information, it’s crucial to link to your privacy policy. This is a requirement on KaraboAI and ensures users they're in safe hands.
Step 3: Design and Test Your Chatbot
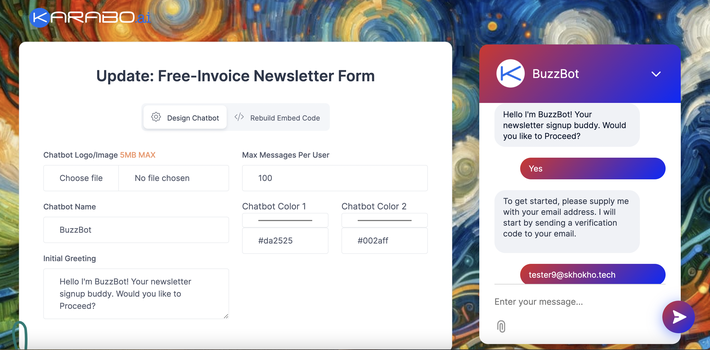
This step is where you bring your chatbot to life visually:
- Customization: Update the logo, the greeting message, and the color scheme to align with your brand’s aesthetics.
- Live Preview: Changes are saved as you go, so you can tweak and refine the appearance and responses without losing any modifications. As you make changes, KaraboAI provides a live preview of your chatbot on the side of the screen. This feature allows you to see how your chatbot will appear to users and lets you test interactions in real-time.
Step 4: Deploy and Start Collecting Data
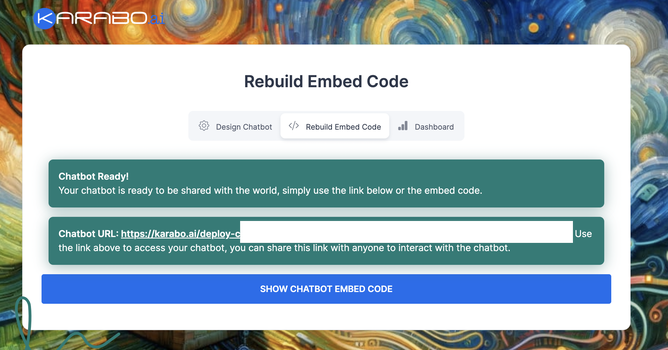
Once you’re satisfied with the design and functionality, it’s time to deploy your chatbot. With KaraboAI, deploying your chatbot is just a few clicks away. Once live, your chatbot will start collecting data from users based on the interactions defined by your data points. All collected information will be neatly organized in the backend dashboard, where you can also connect webhooks for real-time updates or integrate with services like Zapier for further automation.
By following these steps, you can efficiently create a data collection chatbot that not only serves your business needs but also enhances the user experience by making data submission interactive and straightforward.

