Lethabo Moroka
1 year, 9 months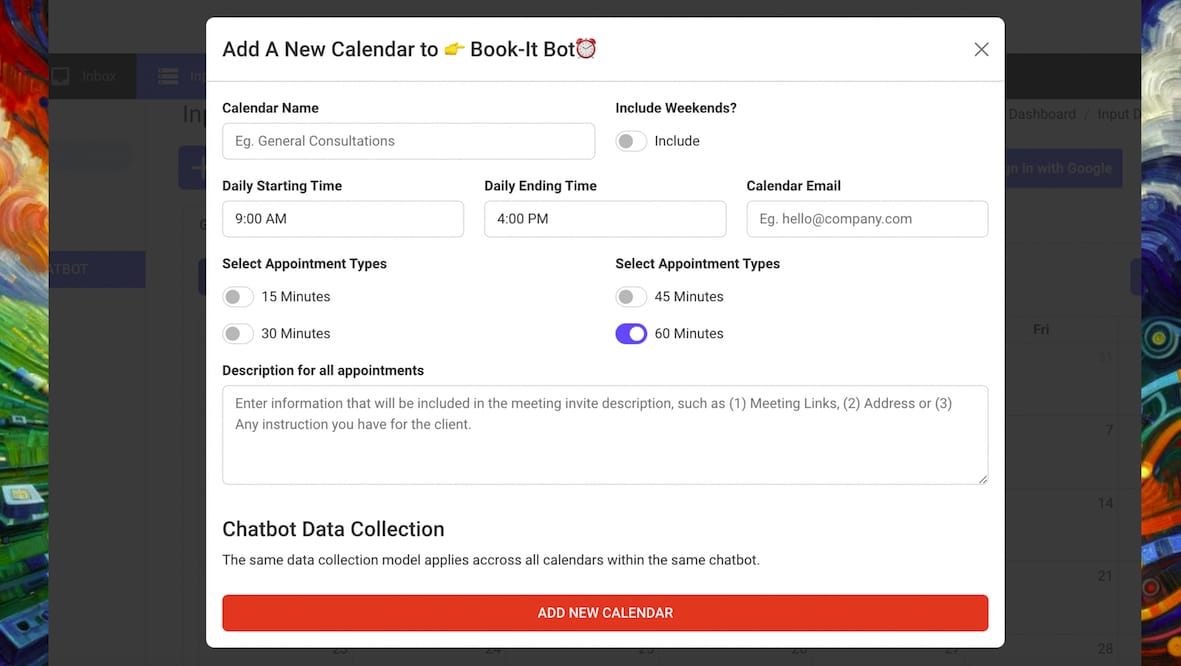
How to: Add a New Calendar to the Same Chatbot
Expanding your calendar capabilities within your chatbot is easier than you might think. Follow these steps to seamlessly integrate additional calendars into your system:
Note you will need a working Calendar Chatbot, if you do not have one, you can use this guide to create a Calendar Scheduling Chatbot.
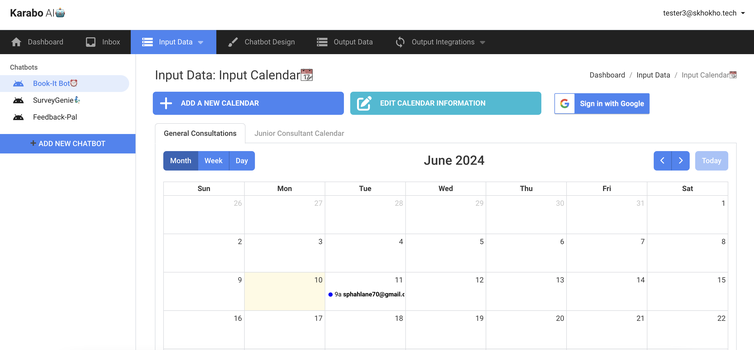
Step 1: Access the Calendar Dashboard
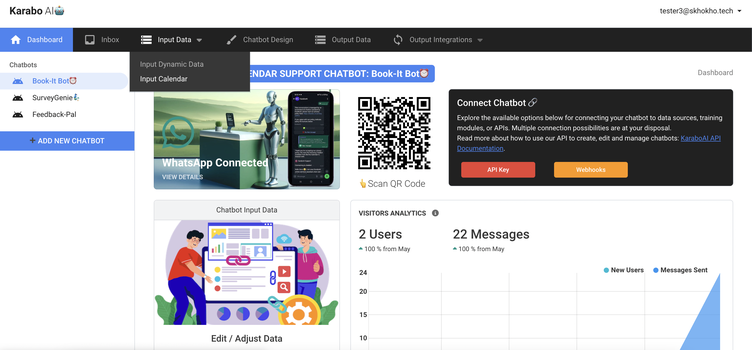
To begin, log in to your KaraboAI account and navigate to the calendar dashboard. From there, locate the top navigation bar and click on “Input Data.” This action will prompt a menu to appear, providing various options for managing your calendar. Select “Input Calendar” from the menu, which will display your current calendar along with any existing appointments. This is the starting point for adding a new calendar to your system.
Choose Input Calendar: From the pop-up menu, select “Input Calendar.” This will display your current calendar along with all existing appointments.
Step 2: Add a New Calendar
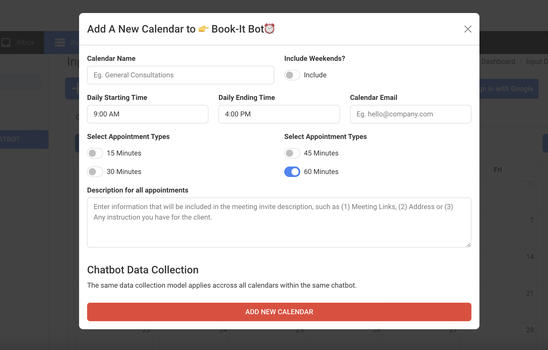
- Click on Add a New Calendar: Locate and click on the “Add a New Calendar” button.
- Fill in the Required Fields: Enter the necessary details for your new calendar:
- Calendar Name: Provide a unique name for your new calendar.
- Include Weekends?: Specify whether to include weekends (radio button option).
- Daily Starting Time: Set the starting time for each day.
- Daily Ending Time: Set the ending time for each day.
- Calendar Email: Enter the email address associated with this calendar.
- Select Appointment Types: Choose the types of appointments (e.g., 15 Minutes, 30 Minutes, 45 Minutes, 60 Minutes).
- Description for All Appointments: Provide a description for all appointments, if necessary.
Step 3: Finalize the New Calendar
Once you have filled in all the required fields, you are ready to add your new calendar. Simply click on the “Add New Calendar” button to finalize the process. This action will integrate the new calendar into your system, allowing you to manage it alongside your existing one.
Step 4: Manage Multiple Calendars
View Your Calendars: You will now see two tabs representing the two different calendars you’ve created. You can switch between these tabs to manage each calendar separately.
Finally – You can use this guide to learn how to integrate Google Calendar to your chatbot.